Following the recent AWS CloudTrail Lake announcement, this blog will guide you through how to configure a Netskope Cloud Exchange instance to send Netskope user access logs to AWS CloudTrail Lake using the Cloud Log Shipper (CLS) module and the CLS plugin developed for CloudTrail Lake. Cloud Exchange (deployed in Amazon ECS on Fargate) can be obtained from the AWS Marketplace.
As a global cybersecurity leader, Netskope is redefining cloud, data, and network security to help organizations apply zero trust principles to protect data. Fast and easy to use, the Netskope platform provides optimized access and zero trust security for people, devices, and data anywhere they go. Netskope helps customers reduce risk, accelerate performance, and get unrivaled visibility into any cloud, web, and private application activity. Thousands of customers, including more than 25 of the Fortune 100, trust Netskope and its powerful NewEdge network to address evolving threats, new risks, technology shifts, organizational and network changes, and new regulatory requirements.
Netskope has visibility into all customer traffic destined for the internet and generates user activity logs, including those related to Amazon Web Services. These logs possess invaluable information for AWS security admin, information that enriches AWS CloudTrail logs available out-of-the-box on AWS. This information includes details about the user, the owner of the AWS credentials in use, the resource they engaged with, the activity the user is engaged in, data objects they interacted with and the safety of those objects, and many other data points for over 300 different Amazon services and activity types.
Here’s a closer look at how to configure this AWS CloudTrail Lake integration with Netskope Cloud Exchange:
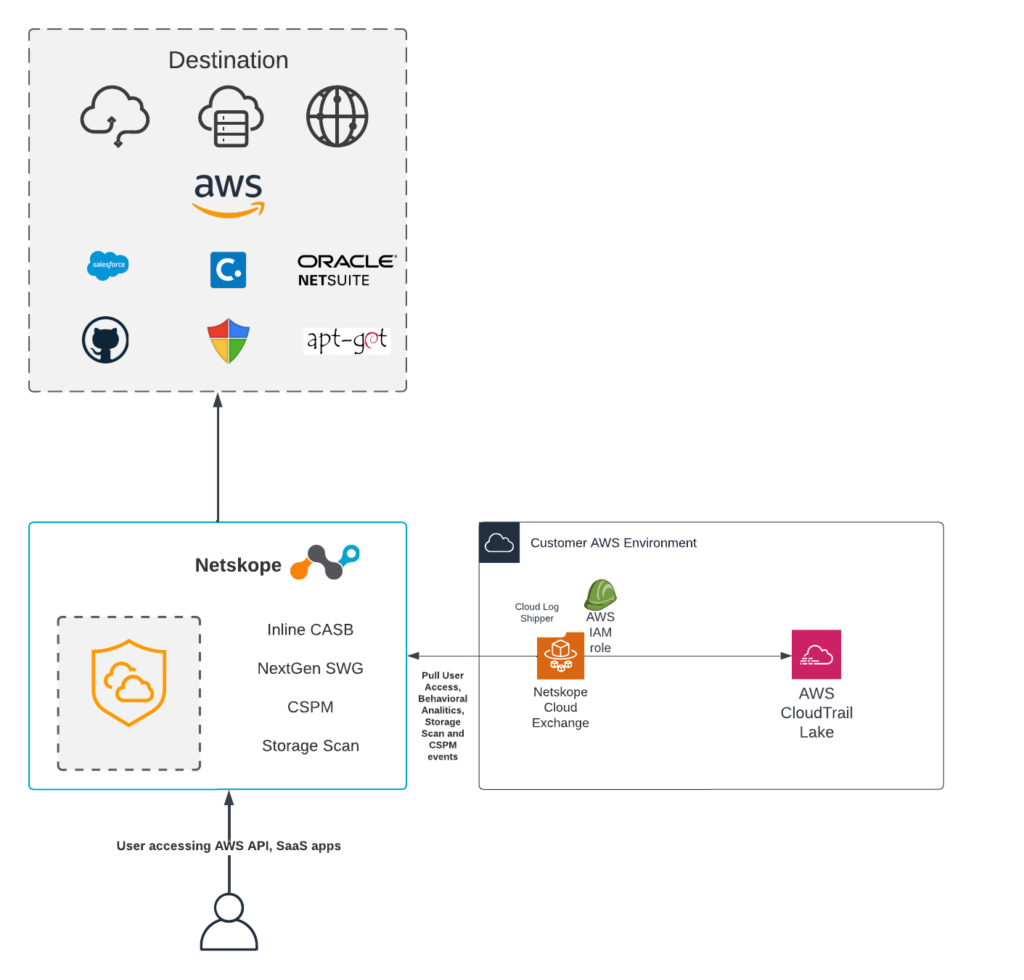
Deployment Guide for Cloud Log Shipper Plugin for CloudTrail Lake v.0.0.1
Customers will need to have deployed Netskope Cloud Exchange into their AWS environment (or into a similar container architecture). Customers can obtain CE for Amazon ECS here, or the docker-based code here if they prefer to install it into a pre-configured Linux host running on an AWS EC2 Instance.
Prerequisites
- The AWS account used must have access to the CloudTrail beta APIs.
- Netskope Tenant (or multiple, for example, production and development/test instances)
- Netskope Cloud Exchange: Log Shipper module
- Connectivity to https://hub.docker.com (if CE is running outside of AWS)
AWS: Creating a user with required permissions
The user, or role that you use to work with to open audit events, must have permissions to call the PutAuditEvents API. Apply a policy with the following permissions to the role. This policy statement allows access to create, manage, and delete event data stores in CloudTrail Lake, run and view queries and results, and load open audit events into CloudTrail.
{
	"Version": "2012-10-17",
	"Statement": [{
			"Effect": "Allow",
			"Action": [
				"cloudtrail:CreateEventDataStore",
				"cloudtrail:UpdateEventDataStore",
				"cloudtrail:DeleteEventDataStore",
				"cloudtrail:ListEventDataStores",
				"cloudtrail:RestoreEventDataStore",
				"cloudtrail:GetEventDataStore",
				"cloudtrail:StartQuery",
				"cloudtrail:ListQueries",
				"cloudtrail:CancelQuery",
				"cloudtrail:DescribeQuery",
				"cloudtrail:GetQueryResults"
			],
			"Resource": "*"
		},
		{
			"Effect": "Allow",
			"Action": "cloudtrail-data:PutAuditEvents",
			"Resource": "*"
		},
		{
			"Effect": "Allow",
			"Action": [
				"iam:ListRoles",
				"iam:GetRolePolicy",
				"iam:GetUser"
			],
			"Resource": "*"
		},
		{
			"Effect": "Allow",
			"Action": [
				"iam:PassRole"
			],
			"Resource": "*",
			"Condition": {
				"StringEquals": {
					"iam:PassedToService": "cloudtrail.amazonaws.com"
				}
			}
		}
	]
}
AWS CloudTrail Lake: Creating an event data store
You must have an event data store. If it does not already exist, you can create one by following the steps listed below.
- Log in to AWS console.
- Navigate to CloudTrail > Lake.
- Click Event data stores.
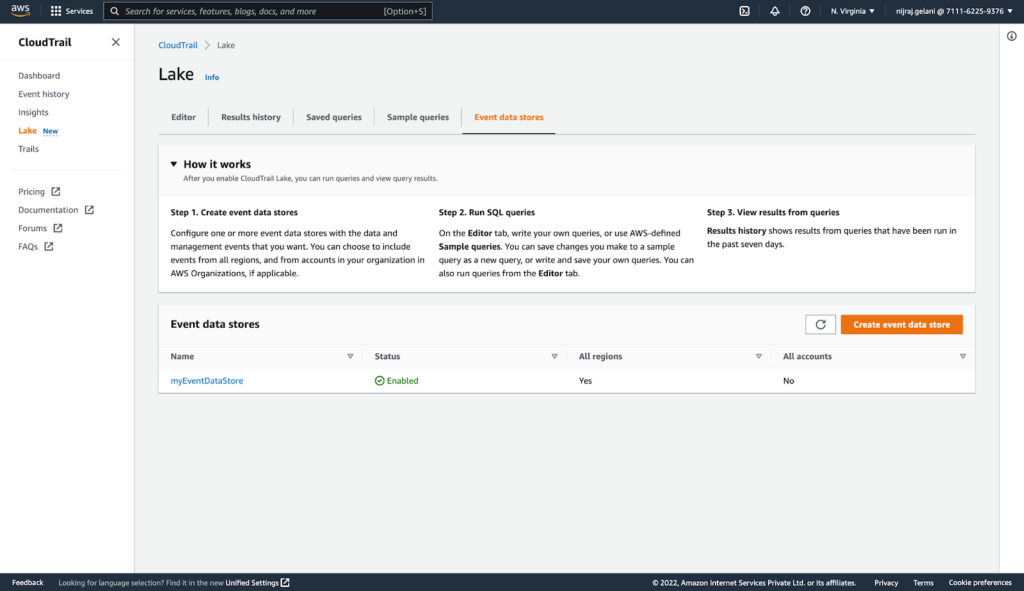
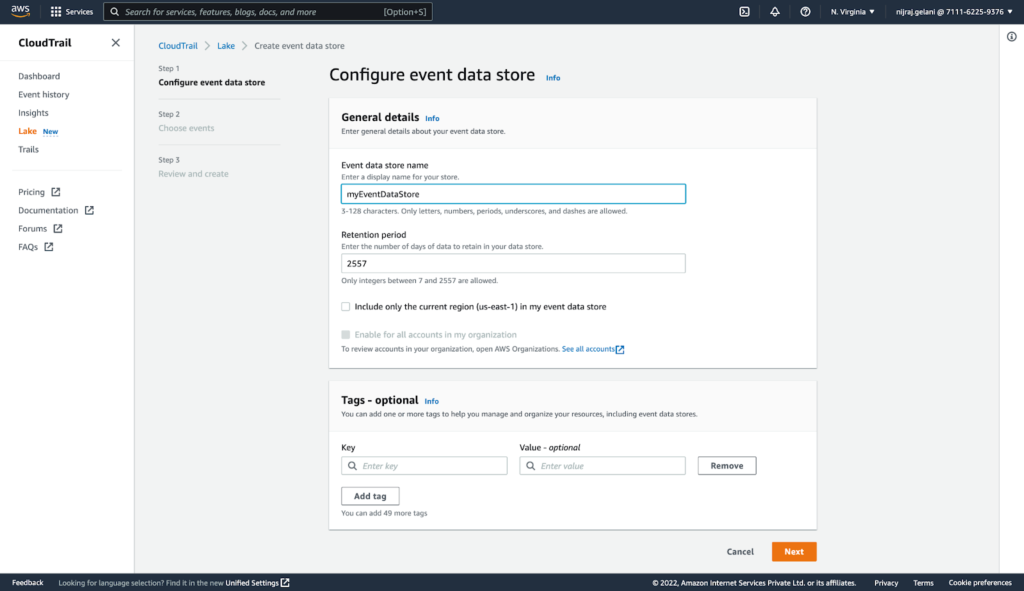
- Click Create event data store and provide a data store name, and retention period.
- Click Next
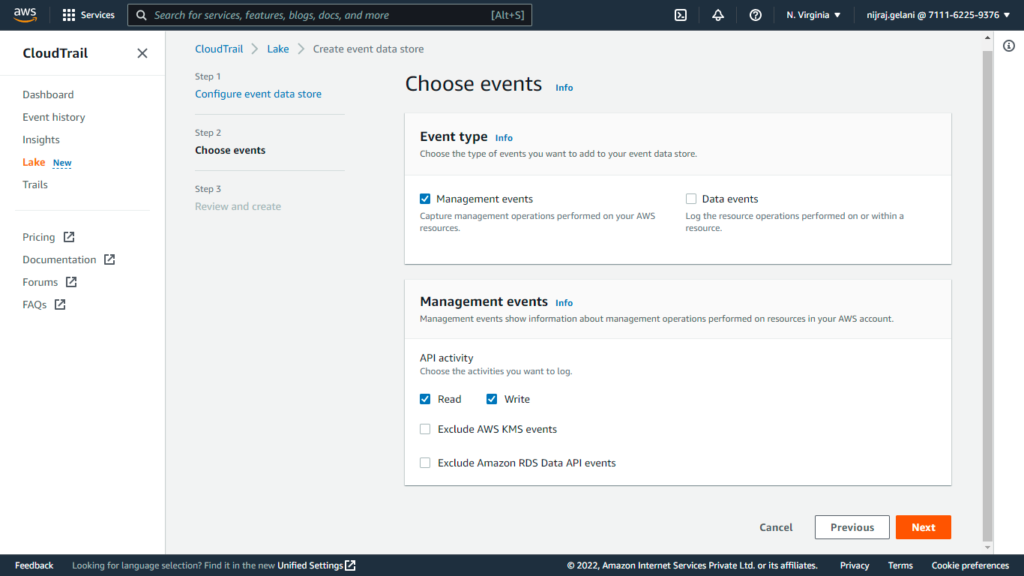
- Choose the Type of the Events and choose the activities you want to log.
- Click Next.
- Click Create event data store
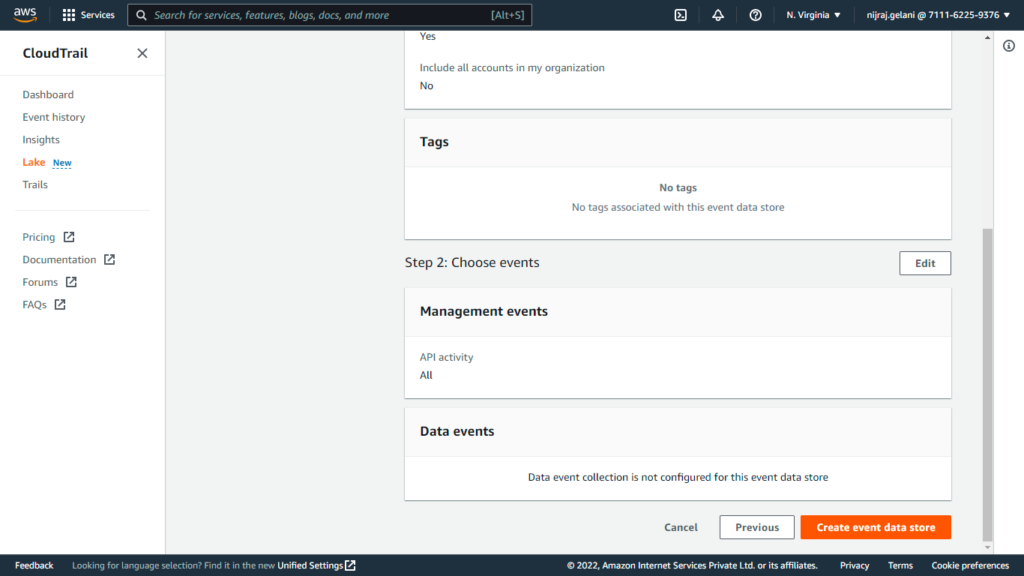
- Click Create event data store
Using AWS CLI:
- Execute command replacing “my-event-data-store” with your event data store name:
aws cloudtrail create-event-data-store \
 --name my-event-data-store \
 --retention-period 90 \
 --advanced-event-selectors '[
{
"Name": "Select all open audit events",
"FieldSelectors": [
{ "Field": "eventCategory", "Equals": ["ActivityAuditLog"] }
]
}
]'
AWS: Obtaining Access Key ID and Secret access key
- Login to AWS Console.
- Click on the username (top right corner) and navigate to Security Credentials.
- Click on Create access key.
- Make note of the Access Key ID and Secret access key.
Netskope CLS: AWS CloudTrail Lake plugin configuration
- Log in to your CE instance.
- Navigate to Settings > Plugins.
- Click on the AWS CloudTrail Lake plugin tile.
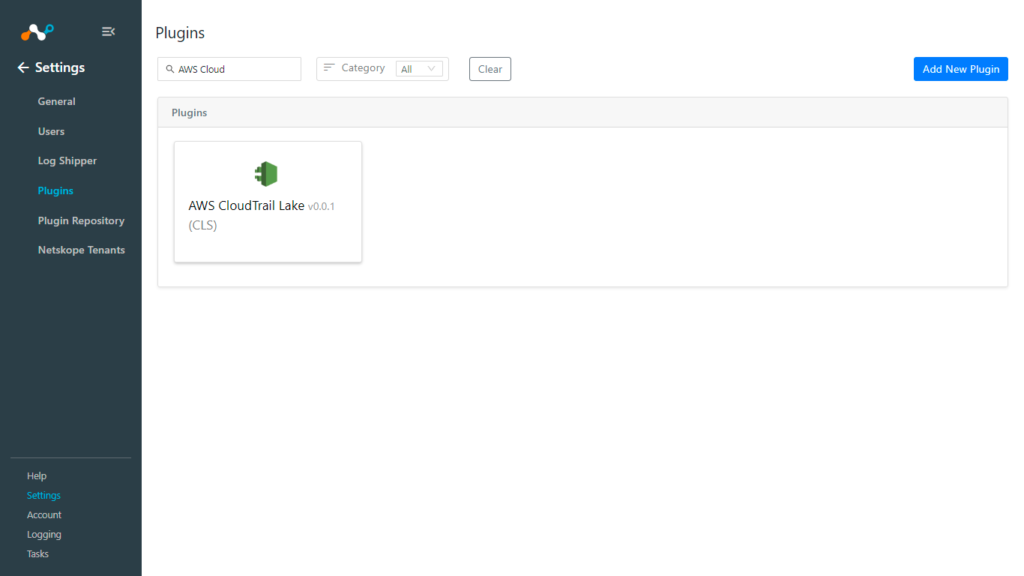
- Fill out the form with these values:
- Configuration Name: Unique name for the configuration.
- Mapping: Select the valid Mapping. (Default Mapping for all plugins are available. If you want to Create New Mapping, follow the CLS guide to Create New Mapping.)
- Use System Proxy: Enable if proxy is required for communication.
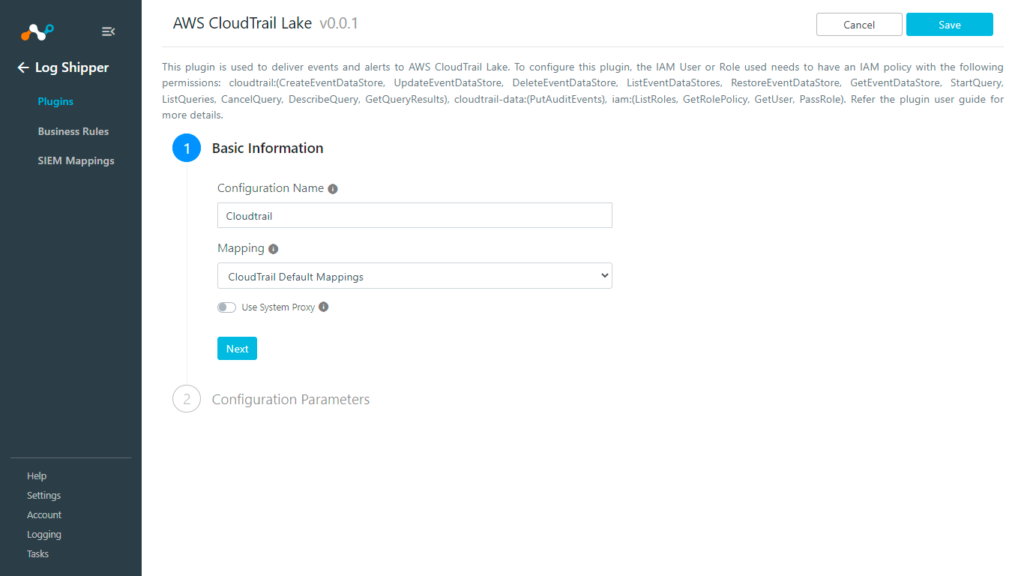
- Click on Next.
- Fill out the form with these values:
- AWS Access Key ID (Public Key): AWS Access Key ID obtained previously.
- AWS Secret Access Key (Private Key): AWS Secret Access Key obtained previously.
- AWS Account ID: AWS Account ID obtained previously.
- Region Name:Region Name.
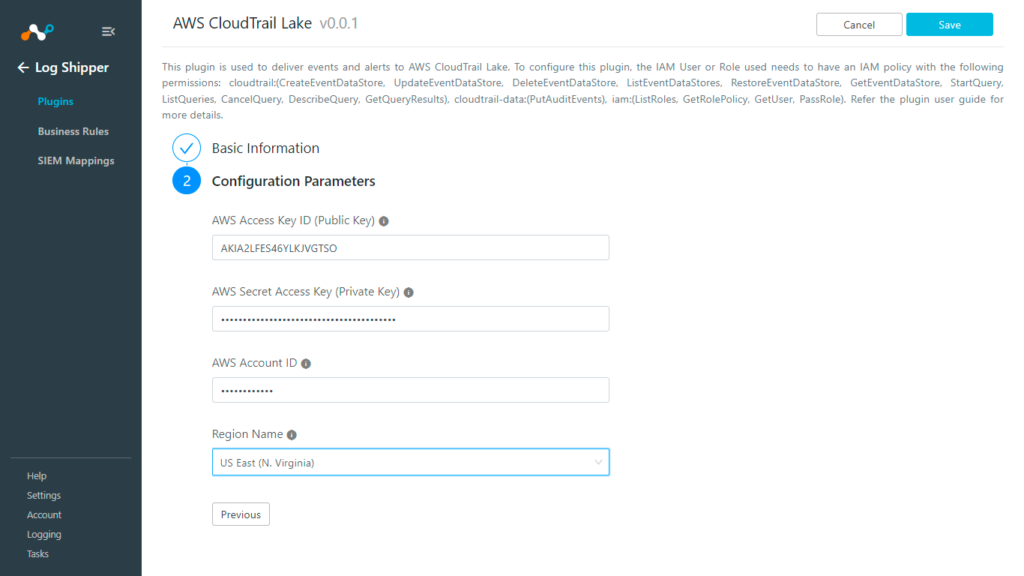
- Click Save.
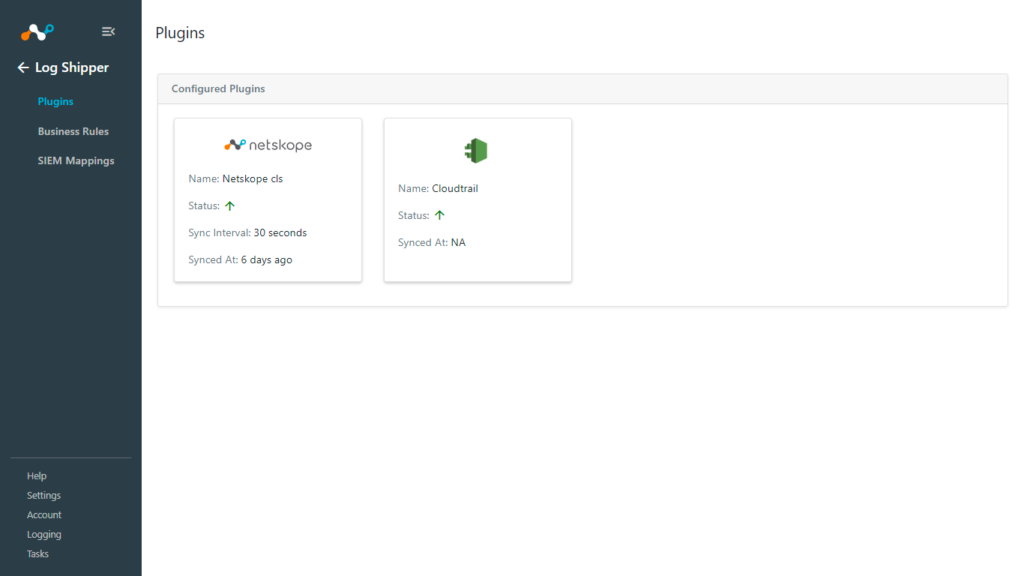
Validation
From Netskope Cloud Exchange
To validate proper connectivity and plugin function from within Netskope Cloud Exchange:
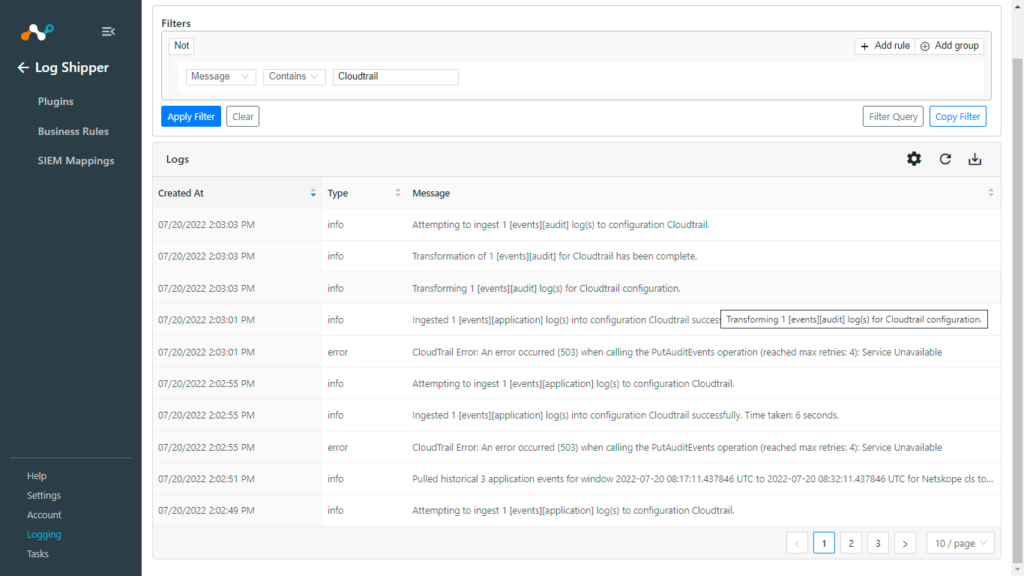
- Navigate to Logging.
- Look for the “ingestion of X event logs into configuration CloudTrail success” as shown in the screenshot below.
From AWS Console
To validate proper connectivity and plugin function from within CloudTrail Lake.
- Login to AWS Console.
- Navigate to CloudTrail > Lake. Click on the Editor tab.
- Copy the Event data store ID.
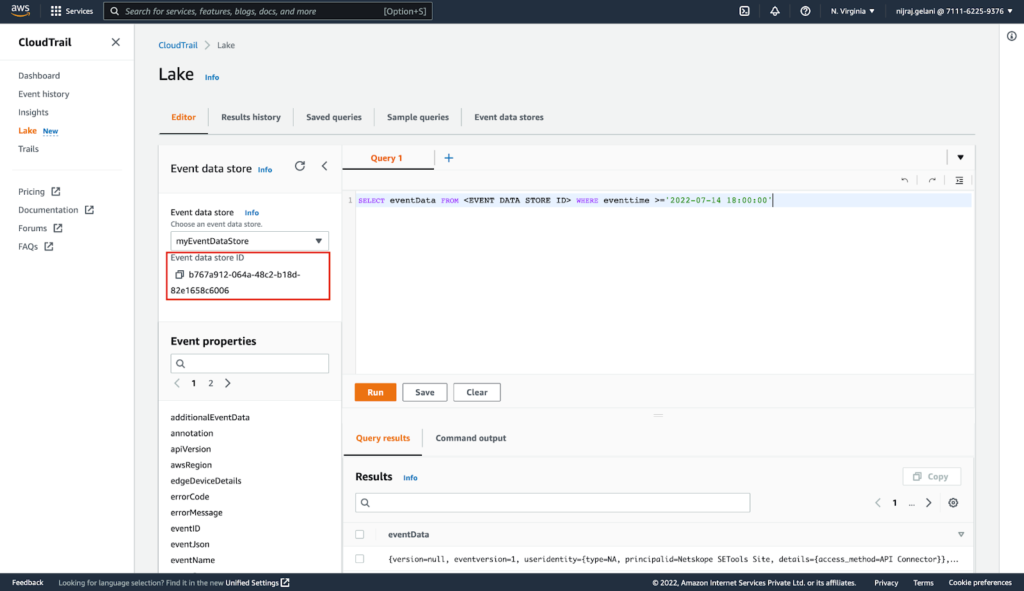
- Enter this query (replace <EVENT DATA STORE ID> previously copied ID and the datetime with your desired datetime; events created after this datetime will be shown) in the editor and click Run.
SELECT eventData FROM <EVENT DATA STORE ID> WHERE eventtime >='2022-07-14 18:00:00'
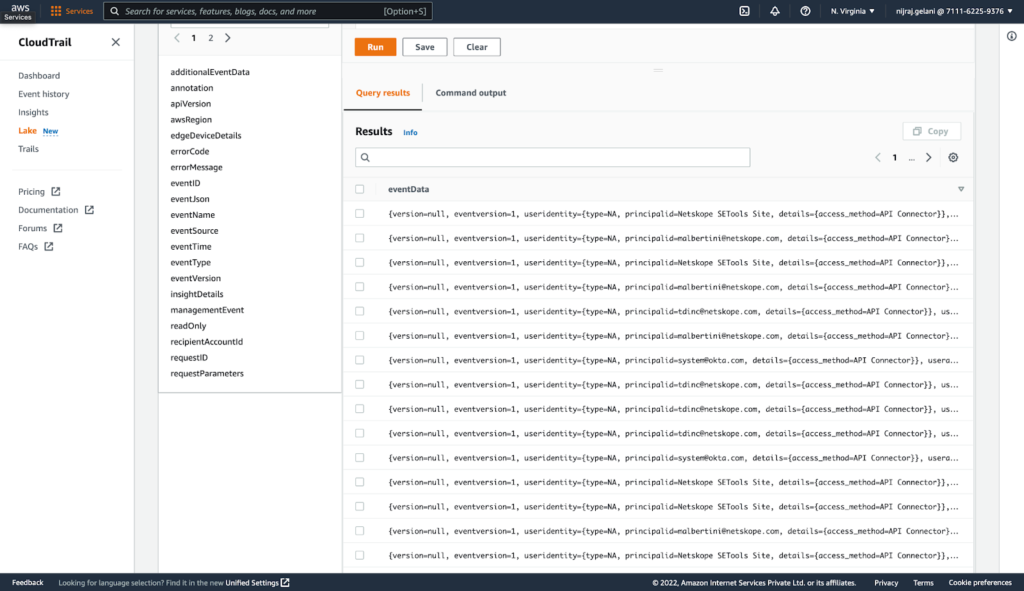
- Scroll down to see the ingested events.
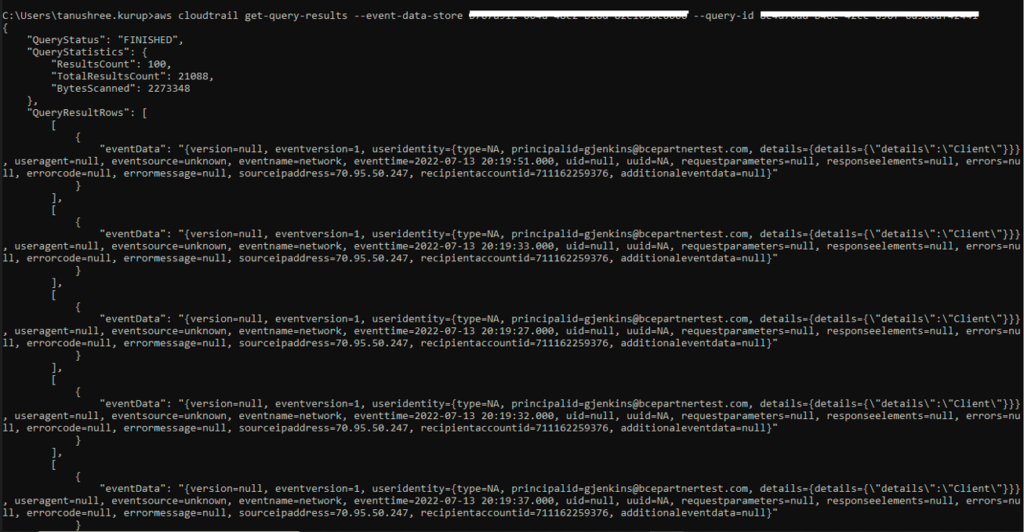
From AWS CLI
To validate proper connectivity and plugin function from within the AWS CLI.
- Execute command aws cloudtrail list-event-data-stores to obtain the event data store ID.

- Copy the Event Data store ID from the above response.
- aws cloudtrail start-query –query-statement “SELECT eventData FROM <Event Data Store ID obtained in the previous step>”

- Copy the Query ID obtained from the previous response.
- aws cloudtrail get-query-results –event-data-store <Event ID> –query-id <Query ID>
Next Steps
Learn more about the recent AWS CloudTrail Lake announcement here. Cloud Exchange (deployed in Amazon ECS on Fargate) can be obtained from the AWS Marketplace.


 Retour









 Lire le blog